The Complete Guide
Everything about Ancient Warden in one place, in plain English, with pictures of the real menus. If you are wondering how something works, it is on this page. Use the search box to jump straight to it.
Contents
Nothing matched that. Try a simpler word, or browse the list on the left.
Your first five minutes
There is nothing to download and nothing to pay. You open the site, make a character, and you are in the world.
Press Play
Hit Play Now at the top of any page. That takes you to the character screen.
Make an account, or play as a guest
An account is free and takes about twenty seconds. It keeps your characters safe and lets you use friends, invites and the hiscores.
You can also press play as a guest. Your progress still saves online, but only this browser can open it. If the browser clears its data, those characters are gone for good and nobody can get them back. You can create an account later, so guest is fine for a first look.
Build your character
Pick a name, then style your adventurer: body type, hair, eyes, brows, mouth, skin tone, hair colour, eye colour, shirt colour and trouser colour. There is a Randomize button if you would rather roll the dice.
None of it affects how you play. There are no classes in this game. What you are good at is decided by what you carry and what you train, and you can change your mind at any point.
Choose where to play
You can start your own private world, or join an always-on realm that other people are already in. Both use the same character. See Worlds and realms for the difference.
Follow the walkthrough
A small card appears in the corner on your first character and walks you through every part of the screen. You can skip it, and you can replay it whenever you like from Settings, under Help & Support.
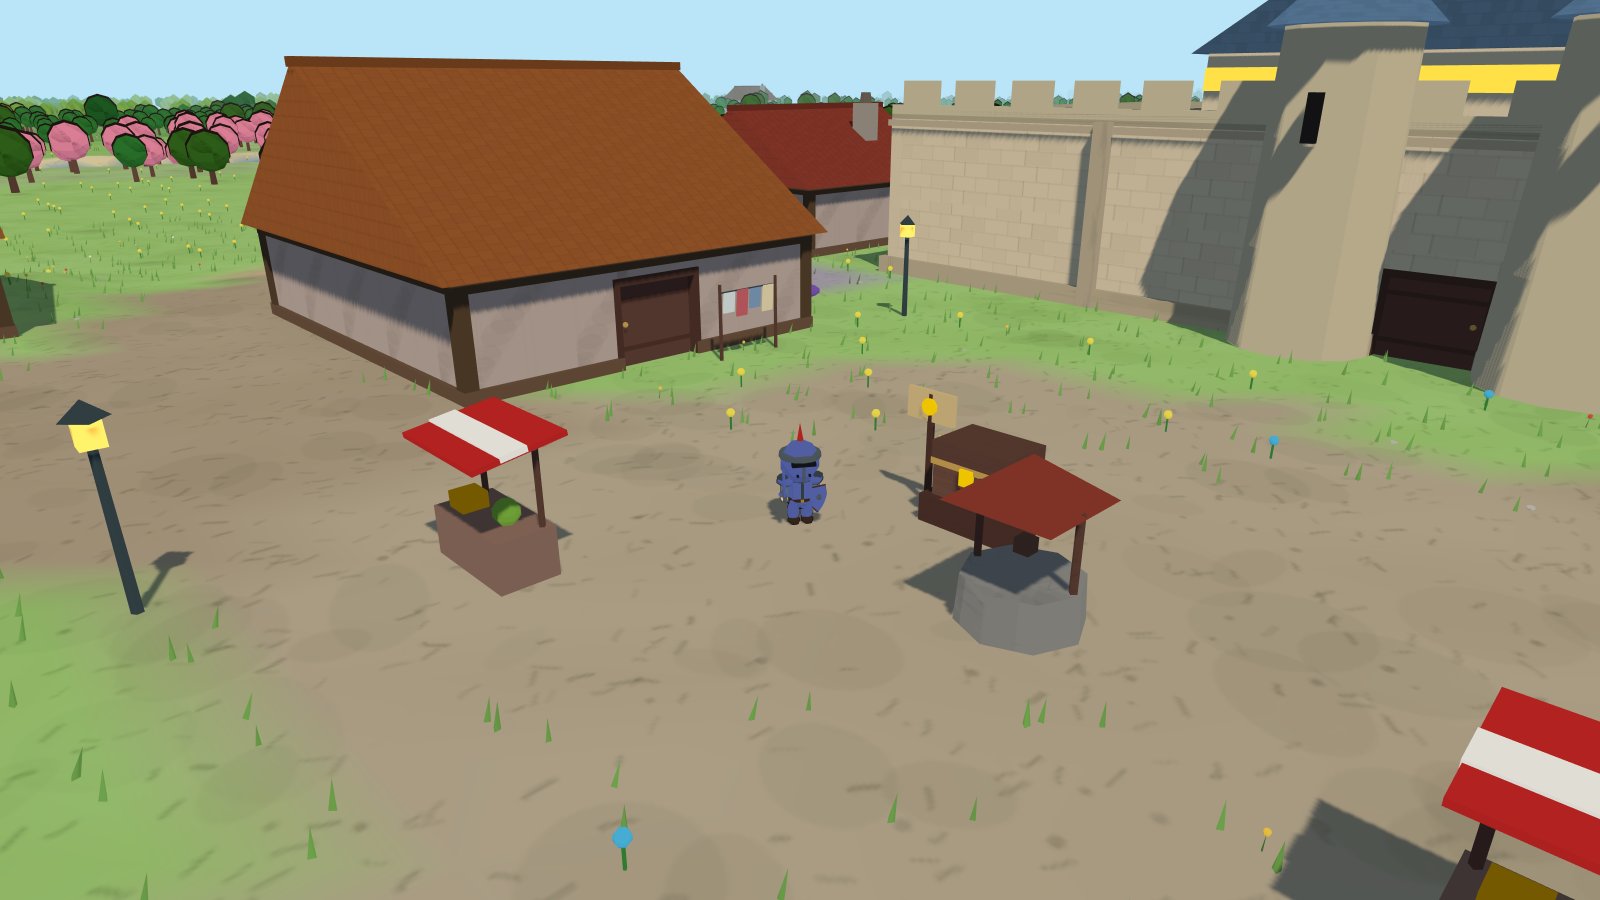
Then go and find Mother Rowan in Brightmeadow and start the first quest. It teaches you fishing, cooking and woodcutting and pays for your first upgrades.
Which browser and device to use
Ancient Warden draws a full 3D world in your browser. Every browser can do that, but they are not all equally good at it. This is the short version.
Use Chrome if you can
We build and test the game on Google Chrome first, so Chrome is where it looks best and runs fastest. Chrome tends to get the most out of your graphics chip, has the best support for installing the game as an app, and gets fixes for 3D bugs quickly.
Anything built on the same engine behaves almost identically, so Microsoft Edge, Brave, Opera and Vivaldi are all just as good in practice.
| Browser | How it runs | What to know |
|---|---|---|
| Chrome (Windows, Mac, Linux, Android) | Best | What we develop against. Full install support, best speed, fewest surprises. |
| Edge, Brave, Opera, Vivaldi | Best | Same engine as Chrome, so effectively the same experience. |
| Firefox | Good | Plays fine. Can be a little slower in busy towns on some machines. Try one graphics tier lower if it stutters. |
| Safari on Mac | Good | Plays fine. Installs to the Dock instead of showing an install button. Needs Safari 17 or newer for that. |
| Safari on iPhone and iPad | Good | The only way to install the game on an iPhone or iPad. See below. |
| Very old browsers | Will not run | The game needs a browser from roughly the last five years. If the screen stays black, update your browser first. |
Phones, tablets and computers
Computer
The best way to play. Mouse and keyboard, biggest screen, most power. Right click gives you extra options on everything.
Tablet
Very comfortable. Big enough for the panels, and full touch controls. A good middle ground.
Phone
Everything works, laid out for one hand. Panels go full width and the tab bar moves to the bottom. Press and hold replaces right click.
The same character works everywhere. You can fish on your phone at lunch and carry straight on at your desk in the evening.
Installing the game as an app
Ancient Warden can be installed to your device like a normal app. It is still the same web game, it just gets its own icon and its own window, with no browser bars around it.
Why bother
More screen
No address bar, no tabs, no bookmark strip. On a phone that is a surprising amount of extra world.
Opens in one tap
An icon on your home screen, dock or start menu. No typing an address, no hunting for the tab.
Loads quicker
The page shell is kept on your device after the first visit, so it opens faster and shows a proper offline page instead of a browser error if your connection drops.
Fewer accidents
No stray swipe that goes back a page in the middle of a boss fight.
How to install it, device by device
This part genuinely differs per device, because each company allows something different.
| Device | What you do | What you get |
|---|---|---|
| Android (Chrome, Edge, Brave) | An Install app button appears on the site. Tap it and confirm. You can also use the browser menu and choose Install app or Add to Home screen. | A real app icon in your app drawer. Opens fullscreen with no browser bars at all. |
| Windows and Linux (Chrome, Edge) | An Install app button appears on the site. There is also a small install icon at the right of the address bar. | Its own window with no tabs, and an entry in your start menu or applications list. You can pin it to the taskbar. |
| iPhone and iPad (must be Safari) | Tap the Share button in Safari, the square with an arrow pointing up. Scroll down, tap Add to Home Screen, then tap Add. | An icon on your home screen that opens fullscreen. Apple does not allow other browsers to do this, so open the site in Safari first. |
| Mac (Safari 17 or newer) | Click the Share button in Safari's toolbar, then choose Add to Dock. | Ancient Warden in your Dock, opening in its own window. If you do not see the option you need a newer macOS. |
| Mac (Chrome, Edge) | Use the Install app button on the site, or the install icon in the address bar. | Its own window and an entry in Launchpad. |
The site shows the install button by itself when your browser supports it. On iPhone, iPad and Safari on Mac the button opens the step by step instructions above instead, because those browsers do not offer a one click install.
Fullscreen without installing
You do not have to install anything to get a bigger picture. In game, open Settings and use the Fullscreen toggle. On a computer that fills the whole screen. On an iPhone there is no fullscreen button in the browser at all, which is exactly why adding it to your home screen is worth doing there.
Your screen explained
Here is the game screen with everything in its place. The numbers match the list underneath.
- 1The health orb, top left. The number is your current health and the coloured fill shows how much is left. Green is healthy, orange is getting low, red means eat something now.
- 2The info line, beside the orb. Your combat level and how many coins you are carrying.
- 3The quest tracker, under the orb. The quest you are following, what to do next, and an arrow that always points at where you should go. Tap it to open your quest journal.
- 4The minimap, top right. Yellow dots are people, red dots are monsters. Tap anywhere on it to walk there.
- 5The compass, on the corner of the minimap. Tap it to point the camera north again when you have got yourself turned around.
- 6The map button. Opens the full world map. Keyboard shortcut M.
- 7The boot button. Switches between walking and running. It glows when running is on, and the game remembers your choice.
- 8The message log, bottom left. Short notes about what just happened, colour coded: green for skills, yellow for quests, red for warnings, blue for the game talking to you.
- 9The tab bar, bottom right. Eight buttons that open your panels. On a phone these sit along the bottom of the screen.
There is also a chat panel in the bottom left corner. On a computer it starts open, on a phone it starts as a small bubble you can tap. Press Enter to type.
The eight tabs
| Icon | Tab | What it is for |
|---|---|---|
| Combat | How you fight. Attack style, auto retaliate, your gear bonuses. More | |
| Skills | All twelve levels and how close you are to the next one. Tap any skill to see what it unlocks. More | |
| Inventory | Your backpack, 28 spaces. More | |
| Equipment | What you are wearing and holding. More | |
| Quests | Every story you have started or finished. More | |
| Friends | Add friends, see who is online, invite them in. More | |
| Magic | Your spellbook. More | |
| Settings | Graphics, sound, help, log out. More |
Tapping the same tab button again closes the panel, so you can get the view clear in one tap.
Controls
Everything in the world works the same way: point at it and click, or tap it on a touch screen. Your character walks over and does the sensible thing.
| What you want | Computer | Phone or tablet |
|---|---|---|
| Walk somewhere | Left click the ground | Tap the ground |
| Attack a monster | Left click it | Tap it |
| Talk to a person | Left click them | Tap them |
| Chop, mine, fish, cook | Left click the tree, rock, water or fire | Tap it |
| See all the options for something | Right click it | Press and hold it |
| Turn the camera | A D, left and right arrows, or hold the middle mouse button and drag | Drag with one finger |
| Tilt the camera up and down | W S or up and down arrows | Drag up and down |
| Zoom in and out | Scroll wheel | Pinch |
| Face north again | Click the compass on the minimap | Tap the compass |
| Walk or run | The boot button beside the minimap | |
| Open the world map | M or the map button | The map button |
| Item options: eat, wear, drop, examine | Right click the item in your bag | Press and hold the item |
| Chat | Enter, type, Enter again | Tap the chat bubble, then the box |
| Close a menu | Esc | The ✕ button |
Getting around
Walking and running
Click or tap the ground and you walk there. You walk by default. Tap the boot button beside the minimap to switch to running, which is noticeably faster and much nicer for long trips. The button glows while running is on and the game remembers it for next time.
Top left, the compass. Puts the camera back to facing north.
Bottom left, the map. Opens the full world map, or press M.
Bottom right, the boot. Walk or run. Glowing means running.
The circle itself. Tap anywhere on it to walk to that spot. Yellow dots are people, red dots are monsters.
The world map
The map button, or M, opens the whole realm. You can tap a place on it to travel there, which saves a lot of clicking on long journeys. Note that travelling still means walking, so it takes time, and anything hostile along the way is still hostile.
There is also a browsable world map on this site if you want to plan a trip before you log in.
Doors, upstairs and downstairs
- Buildings are real places, not painted scenery. Walk through the door and the roof lifts away so you can see inside.
- Stairs work by clicking. Inns and some larger buildings have an upstairs. Click the staircase to go up, click it again to come back down.
- Caves have a marked entrance on the surface: a dark hole ringed with rocks, a grate in a street, or a stair tucked into a ruin. Click it to climb down, and use the lit exit inside to climb back out.
Teleporting
Once you have some Magic, teleport spells replace most walking. There is a free Homeward teleport from level one that gets you out of anywhere, and city teleports unlock as your Magic level climbs. See Magic and sigils.
If you ever get badly stuck, Settings has a Stuck? Return to Brightmeadow button that always works and costs nothing.
Talking to people and doing quests
Talking
Click any person to talk to them. A conversation window opens with what they say and your possible replies. Click a reply to continue. Some people also run shops, in which case right clicking them gives you a Trade with option that skips the small talk.
Talk to everybody. The people of this realm point the way to nearly every secret in it, and plenty of quests only appear once you have had a conversation with the right person.
Starting a quest
Quests start by talking to the person who has the problem. There is no quest board and no accept button to hunt for. Once a quest is going it appears in your Quests tab.
The quest journal
Colours tell you where you stand at a glance:
- Green and crossed out means finished.
- Yellow means you are in the middle of it.
- Plain means you can start it but have not.
- Dim with a padlock means an earlier quest has to be done first.
Tracking a quest
Open a quest and choose to track it. Its next step then appears in the small panel under your health orb, with an arrow that always points at where you need to go and how far away it is. Tap that panel at any time to jump back into the journal.
Collection steps are helpful about it: the moment your bag holds everything a step needs, you get a message telling you so. Follow the arrow back to whoever sent you.
The main story
The realm's main storyline is The Ancient Warden, fifteen quests in three acts, played strictly in order. Each one opens the next. It starts as a quiet errand out of Brightmeadow and grows a very long way from there.
| Quest | Starts with | Difficulty |
|---|---|---|
| Act I, The Crack | ||
| The Road from Brightmeadow | Mother Rowan, Brightmeadow | Novice |
| What the Stones Remember | Ferrin Vael, Valeport quay | Novice |
| A Census of Small Miracles | Archivist Senna, Coronmar plaza | Intermediate |
| Where the River Goes | Wen Alcaster, Vale Heights rim | Experienced |
| Ash on the Wind | Sergeant Halda, Highspire | Experienced |
| The Steam and the Lake | Wen Alcaster, Vale Heights rim | Experienced |
| The Grey Answer | Preceptor Aldous, Castle Greyhold | Experienced |
| Vaurenth | Hearthkeeper Brann, Frosthollow | Master |
| Act II, The Gilding | ||
| The Gilded Coast | Quartermaster Ives, Solmara docks | Experienced |
| The Scholars of Vessa | Scholar Imres, Vessa | Experienced |
| Seven Voices | Scholar Imres, Vessa | Master |
| The Hollowvale | The Hollowvale, north past Vessa | Grandmaster |
| Act III, The Lie | ||
| The Concord of Nine | The rim-script, the Vale Heights | Grandmaster |
| Velmora | The Master of Velmora | Grandmaster |
| The Ashen Choir | Cantor Ilse, Vesperion | Grandmaster |
That is the titles, where each begins and how hard it is, and nothing else. The story is best met in the playing of it. If you want more detail, the wiki has the full quest list.
Fighting
Click a monster and your character walks over and fights it. That is the whole of it. Fights carry on by themselves until something dies or you walk away.
There are no classes
You become a warrior, an archer or a mage simply by holding a sword, a bow or a staff. Swap the weapon and you have swapped how you fight, with no penalty and no waiting. One character can be all three.
The Combat tab
This tab changes to match whatever is in your hand, so you never see a choice that makes no sense, like training Attack with a bow.
Attack style decides which skill you train while you fight. Pick the one you want to grow. You can change it mid fight.
Auto retaliate is on by default. It means that if something jumps you, you fight back automatically instead of standing there taking it. Turn it off only if you have a reason to.
The bonus grid adds up everything your gear gives you. Bigger numbers mean you hit more often, hit harder, or get hit less.
Styles with a melee weapon
- Accurate trains Attack, which helps you land hits.
- Aggressive trains Strength, which makes your hits bigger.
- Defensive trains Defence, which makes enemies miss you more.
Styles with a bow
- Accurate for the best aim.
- Rapid for faster shots.
- Longrange for two extra tiles of reach, splitting the experience with Defence.
Styles with magic
- Accurate for the best chance to hit.
- Defensive to split the experience with Defence.
Every fight also trains Vitality, which raises your maximum health, whatever style you picked. Each kind of weapon remembers its own style choice, so switching from a sword to a bow and back does not lose your settings.
Fighting with a bow
Hold a bow
Wear it from your inventory like any other weapon.
Load your arrows
Click your arrows in the inventory and they go into the Ammo slot in the Equipment tab. That slot holds a whole stack and shows how many are left.
Shoot
Click a monster. Better arrows hit harder, so upgrade them as you level up. Keep an eye on the count, because running out mid fight is not fun.
Fighting with magic
Open the Magic tab, tap a combat spell to set it as your autocast, then attack a monster and you will cast it over and over. Each cast spends a few sigils, the small magical stones in your bag. The Combat tab shows which spell you are casting and has a Clear button to stop. Full details in Magic and sigils.
Knowing what to fight
Every monster shows its name and level above its head, colour coded against you:
- Aggressive creatures like wolves and skeletons attack you on sight, but only while you are around their strength. Once your combat level is more than double theirs they leave you alone completely. Somewhere that felt deadly at level 20 is a pleasant stroll at level 50.
- Bosses attack no matter who you are. They do not care how strong you got.
Food, healing and dying
How to heal
Eat food
Click any food in your bag to eat it and get health back straight away. Better food heals more. This is what you do mid fight.
Sleep in a bed
Go upstairs in any inn, click a bed, and your health is fully restored. Free, unlimited, and available in every village.
Visit the chapel
The Brightmeadow chapel heals you for nothing. Handy when you are in town anyway.
Wait it out
Health also creeps back on its own over time. Fine if you are in no hurry, useless in a fight.
Food comes from Fishing and Cooking, which is why almost everyone trains them early. Catch a load, cook the lot, and you never buy food again.
What happens if you die
You wake up at the Brightmeadow chapel with everything you were carrying. Nothing is taken from you. Death costs you your time and the walk back, not your gear.
Two exceptions worth knowing about, both in your favour:
- In the Eventide Colosseum the stewards simply prop you up outside the door. Arena fights give no experience and no loot, so it is a pure test of your gear against monsters far above anything else in the game.
- If a world has player versus player switched on, other players in that world can attack you. It is off unless someone deliberately turns it on, and everyone in the world gets a warning badge on their screen when it is on. See Worlds and realms.
Skills and training
There are twelve skills. Every one of them goes from level 1 to level 99, and every one is a genuinely long climb. You never pick which ones to have. You simply get better at whatever you actually do.
The Skills tab
The big number is your level. The green bar under it shows how far you are towards the next one.
Tap any skill and a window opens listing every single thing that skill unlocks, at what level, with the ones you have already reached ticked off. It is the fastest way to answer "what do I get next?".
What the levels feel like
| Levels | How it feels |
|---|---|
| 1 to 10 | Just starting out. Weak, but everything is an improvement. |
| 11 to 30 | Finding your feet. You can handle the basics comfortably. |
| 31 to 50 | A solid, capable adventurer. Most of the realm opens up. |
| 51 to 80 | Genuinely strong. Low level content stops being a threat at all. |
| 81 to 95 | Among the best in the realm. Bosses become a fair fight. |
| 96 and up | The greatest. Very little in the world can stand up to you. |
The twelve skills
| Skill | How you train it | What it gives you | |
|---|---|---|---|
| Attack | Fight with a melee weapon on Accurate | Land more hits, and wear better weapons | |
| Strength | Fight with a melee weapon on Aggressive | Hit harder | |
| Defence | Fight on Defensive | Get hit less, and wear better armour | |
| Vitality | Any fighting at all | More maximum health | |
| Range | Fight with a bow | Better bows and better arrows | |
| Magic | Cast spells | Stronger spells, more teleports | |
| Woodcutting | Click a tree while holding an axe | Better logs for fires and for building | |
| Mining | Click a rock while holding a pickaxe | Ore, which becomes bars, which becomes gear | |
| Smithing | Use a furnace, then an anvil | Make your own weapons and armour | |
| Fishing | Click water with the right tool | Raw food, and money | |
| Cooking | Use a fire or a stove | Food that heals a lot more than the raw version | |
| Kindling | Light logs with a tinderbox | A campfire anywhere, for cooking on the road |
How to actually do each gathering job
Chopping wood
Buy an axe, keep it in your bag, and click any tree. Your character does the rest, and logs land in your bag as they come. Trees run out for a moment and grow back.
Regular trees at level 1, oaks at 15, willows at 30, maples at 45, yews at 60, magic trees at 75 and elders at 90.
Mining
Buy a pickaxe, keep it in your bag, and click a rock. Copper and tin at level 1, iron at 15, coal at 30, gold at 45, cobalt at 55, verdite at 70 and arcanite at 85.
Fishing
Fishing needs the right tool for the right catch, so right click the water (or press and hold it) and pick a method from the menu. Only methods you are actually carrying the tool for will appear.
| Where | Tool | What you catch |
|---|---|---|
| Fresh water, lakes and rivers | Net | Shrimp from level 1 |
| Fresh water | Rod | Trout at 20, pike at 30 |
| The sea and its coasts | Net | Shrimp at 1, herring at 10 |
| The sea | Lobster pot | Lobster at 40 |
| The sea | Harpoon | Swordfish at 50, shark at 76 |
| Mirefen swamp pools | Net | Monkfish at 62 |
| Frostpeak ice holes | Rod | Frostfin at 90 |
Cooking
Click a fire or a stove while carrying raw food and you will cook it. You will burn some early on. Everyone does, and it stops as your level climbs.
Making a campfire
Carry a tinderbox and some logs. Right click the logs in your bag and choose Light fire. You now have a fire wherever you are standing, which means you can cook what you just caught without walking back to town.
Smithing
Mine some ore
Copper and tin make bronze. Iron plus coal makes steel, and so on up the ladder.
Smelt it at a furnace
Click a furnace with the ore in your bag and pick what to make. Ore becomes bars.
Hammer it at an anvil
Click an anvil with bars and a hammer, and choose the weapon or armour piece you want. That is your own gear, made from scratch.
Items, your bag and your gear
Your inventory
Your backpack holds 28 things. Coins, arrows, sigils and other small stackable items all pile into a single space no matter how many you have, so you rarely run out of room as fast as you fear.
One click does the obvious thing. Click food to eat it, click armour to wear it, click a weapon to hold it, click arrows to load them.
Right click, or press and hold, for everything else.
The little number in the corner is how many you have of a stackable item.
You can also drag items around the grid to rearrange your bag however you like.
The item menu
Right click any item in your bag, or press and hold it on a touch screen, and you get its options.
- Eat appears on anything edible.
- Wield or Wear appears on weapons and armour.
- Equip appears on arrows and loads them into your ammo slot.
- Light fire appears on logs, if you are carrying a tinderbox.
- Use on… lets you point the item at something else in the world, which is how a lot of quest steps and crafting work.
- Examine tells you what the thing actually is.
- Drop puts it on the ground. Some quest items refuse to be dropped, on purpose.
On a computer, hovering over any item shows a card with its stats, the levels it needs and what it is worth. Requirements you do not meet yet are shown in red, so you can tell at a glance whether something is usable.
Your equipment
You have six slots. Click anything in the Equipment tab to take it off again.
Head, Body, Legs, Weapon and Shield are your armour and weapon slots.
Ammo is the quiver. It holds a whole stack of arrows and shows how many are left. It is not drawn on your character.
The grid at the bottom is the total of everything you are wearing.
Gear tiers
Gear comes in tiers, and each tier needs the matching level in the right skill. Swords need Attack, armour needs Defence, bows need Range, staves and robes need Magic.
| Level | Melee | Range | Magic |
|---|---|---|---|
| 1 | Bronze | Shortbow, leather | Staff, novice robes |
| 10 | Iron | Oak bow | Elemental staves |
| 20 | Steel | Willow bow, studded | Wizard robes |
| 30 | Cobalt | Maple bow | Battlestaff |
| 40 | Verdite | Yew bow, wild hide | Mystic robes |
| 50 | Arcanite | Magic bow | Mystic staff |
| 60 | Draconite | Elder bow, drakehide | Enchanter robes |
| 70 | Shadow | Spectral bow | Ancient staff |
| 80 | Ancient | Ancient bow, ancient hide | Archmage robes |
| 90 | Keeper's | Keeper's bow | Keeper's staff |
Shops sell gear up to around the middle tiers. Everything above that you earn: smith it yourself, or take it from the things that carry it. Shadow gear comes from shadow knights, draconite from the dragon and other great drakes, ancient gear from the guardians of the Old Keep, and keeper's gear from the Warden himself.
Every piece keeps its own numbers, so mixing and matching is completely fair game. Dress for style as well as for stats if you like.
Legendary weapons
The realm's bosses drop unique weapons no shop will ever stock, each with its own look and its own trick: the fast Gnawer's Shiv, the crushing Golemfist Maul, the smouldering Emberfang, and more. They are rare on purpose.
At the very top sit three Ultimate weapons, each demanding level 99 in its skill:
- Dawnbreaker (melee) heals you for a third of every hit you land, so you never need food. Nothing in the realm drops it any more.
- Skypiercer (range) makes its own bolts of light and never needs arrows. Only The Freeze, at the bottom of the Hoarfrost Deep, carries one.
- Staff of Creation (magic) casts every spell in both books without spending a single sigil. The Ember hoards the only one, deep in the Ashen Cellar.
Shops: buying and selling
Shops are how you turn the stuff you gather into the gear you want. Every town has some. This is one screen that does both jobs: the top half is what they sell, the bottom half is what you can sell them.
Opening a shop
Find the shopkeeper
Shops are inside buildings and at market stalls. Walk through the door and the roof lifts off so you can see who is in there.
Click them
Left click starts a conversation, and choosing to see their wares opens the shop. If you want to skip the chat, right click them (or press and hold) and choose Trade with.
The shop window opens
Your coin count is at the top so you always know what you can afford.
Buying, step by step
- 1Find the item you want in the top grid. Each card shows its picture, its name, the price in gold, and how many the shop has in stock.
- 2If the item needs a skill level, it is written under the stock in red, like "Attack 20". You can still buy it, you just cannot use it until you get there.
- 3Press Buy 1 or Buy 5 for the quick amounts, or Buy X to type in exactly how many you want.
- 4The coins come straight out of your bag and the item lands in it. Your coin count at the top updates immediately, so you can see the damage.
Shops restock over time, so if a shop is out of something, come back a bit later.
Selling, step by step
- 1Scroll down to Your items. Everything in your bag that the shop will take shows up there, with the price you would get.
- 2Choose your Sell amount first: 1, 5, a number you type with X, or All. Whichever is highlighted is what a tap will sell.
- 3Tap the item. Done. The coins go into your bag right away.
Quest items cannot be sold, and neither can anything with no value. If something is not in the sell list, that is why.
The bank
Your bag only holds 28 things. The bank is where everything else lives. Look for a bank chest in any decent sized town, and click it.
The bank holds up to 128 different kinds of item, and each kind stacks without limit. So a hundred thousand oak logs still only takes one of your 128 spaces.
How to use it
- 1Pick an Amount at the top: 1, 5, 10, a number you type with X, or All. This one setting applies in both directions.
- 2To store something, tap it in the lower grid, which is your bag.
- 3To take something out, tap it in the upper grid, which is the bank.
- 4Deposit inventory dumps your entire bag into the bank in one press. It is the fastest way to clear space after a long trip.
Your bank travels with your character, so anything you put in is available at any bank chest anywhere in the world.
Where coins come from
There is no shop selling coins, no premium currency and no wallet. Everything you spend, you earned. Here is where it comes from, roughly in the order you will meet it.
Monster drops
Almost everything you kill drops something. Coins, bones, pelts, feathers, sometimes gear. Pick it all up and sell what you do not want.
Selling what you gather
Logs, ore, fish, hides. Steady, safe, reliable, and it trains a skill at the same time.
Quest rewards
Many quests pay well, and the early ones are deliberately generous so you can buy your first proper kit.
Treasure chests
Every proper cave hides a chest in its deepest room. They refill after a few minutes, and the deeper the cave, the better the haul.
Smithing
Turning ore you mined into gear is worth much more than selling the ore raw.
Boss loot
The late game. Bosses drop unique weapons that no shop stocks and that other players want.
What to spend it on, in order
- An axe and a tinderbox, before you leave your first town. Cooked food from your own fire is free healing forever.
- A pickaxe, a net and later a rod.
- A weapon and armour set roughly matching your level. A new sword every 10 levels makes a bigger difference than you would think.
- Arrows and sigils, if you are using a bow or magic. These are the ongoing costs.
- Later on, a home and the portals to go in it.
Magic and sigils
What sigils are
Sigils are the small magical stones that spells burn as fuel. Every spell lists which ones it needs and how many. They stack, so a thousand of them take one space in your bag.
A staff in your hand is what makes you a mage. There is nothing else to switch on.
You buy sigils from magic shops. Eldric at the wizard's tower in Duskmoor is the usual first stop. Rarer ones come from specialist sellers, like Mystic Zara in Zahara, once you have earned her trust.
The spellbook
The small number in the corner is the Magic level a spell needs.
- Bright and clear means you can cast it right now.
- Slightly dimmed means you have the level but not the sigils.
- Grey and faded means the level is too low, or a quest still has to be finished.
- Glowing purple means it is your current autocast spell, or a toggle spell that is switched on.
Hover a spell on a computer, or press and hold on a phone, to see exactly which sigils it wants. Ones you are short of show in red.
How to cast
| Kind of spell | What to do |
|---|---|
| Combat spells | Tap the spell once to set it as your autocast. Now attack a monster and you will cast it repeatedly. Tap it again, or use Clear on the Combat tab, to stop. |
| Teleports | Tap it and you go. No target needed. |
| High Alchemy | Tap the spell, then tap an item in your bag to turn it into gold. Tap the spell again to cancel. |
| Toggle spells like levitation | Tap once to turn on, tap again to turn off. They glow while active. |
The two spellbooks
Elemental is the book everyone starts with. It runs from Gale Dart at level 1 up to Flame Fury at level 95, with teleports to seventeen cities along the way, plus a free Homeward teleport from level one that is your way out of anywhere.
The Ancient Rites are a second book, and nobody from these lands wrote a word of them. You learn them far to the east, on the Gilded Coast, from the scholars who can still read the old script. Their spells hit harder and carry a sting:
- Blight spells poison your target.
- Wither spells weaken its attack.
- Leech spells heal you for part of the damage.
- Ice spells freeze your target where it stands.
Each comes in four strengths: Curse, Hex, Siege and Cataclysm. Ice Cataclysm at level 94 is, quite simply, the scariest thing in the realm that is not a dragon.
You switch between the two books with the toggle at the top of the tab. The Ancient tab stays locked, and tells you which quest opens it, until you have done that quest.
Sailing
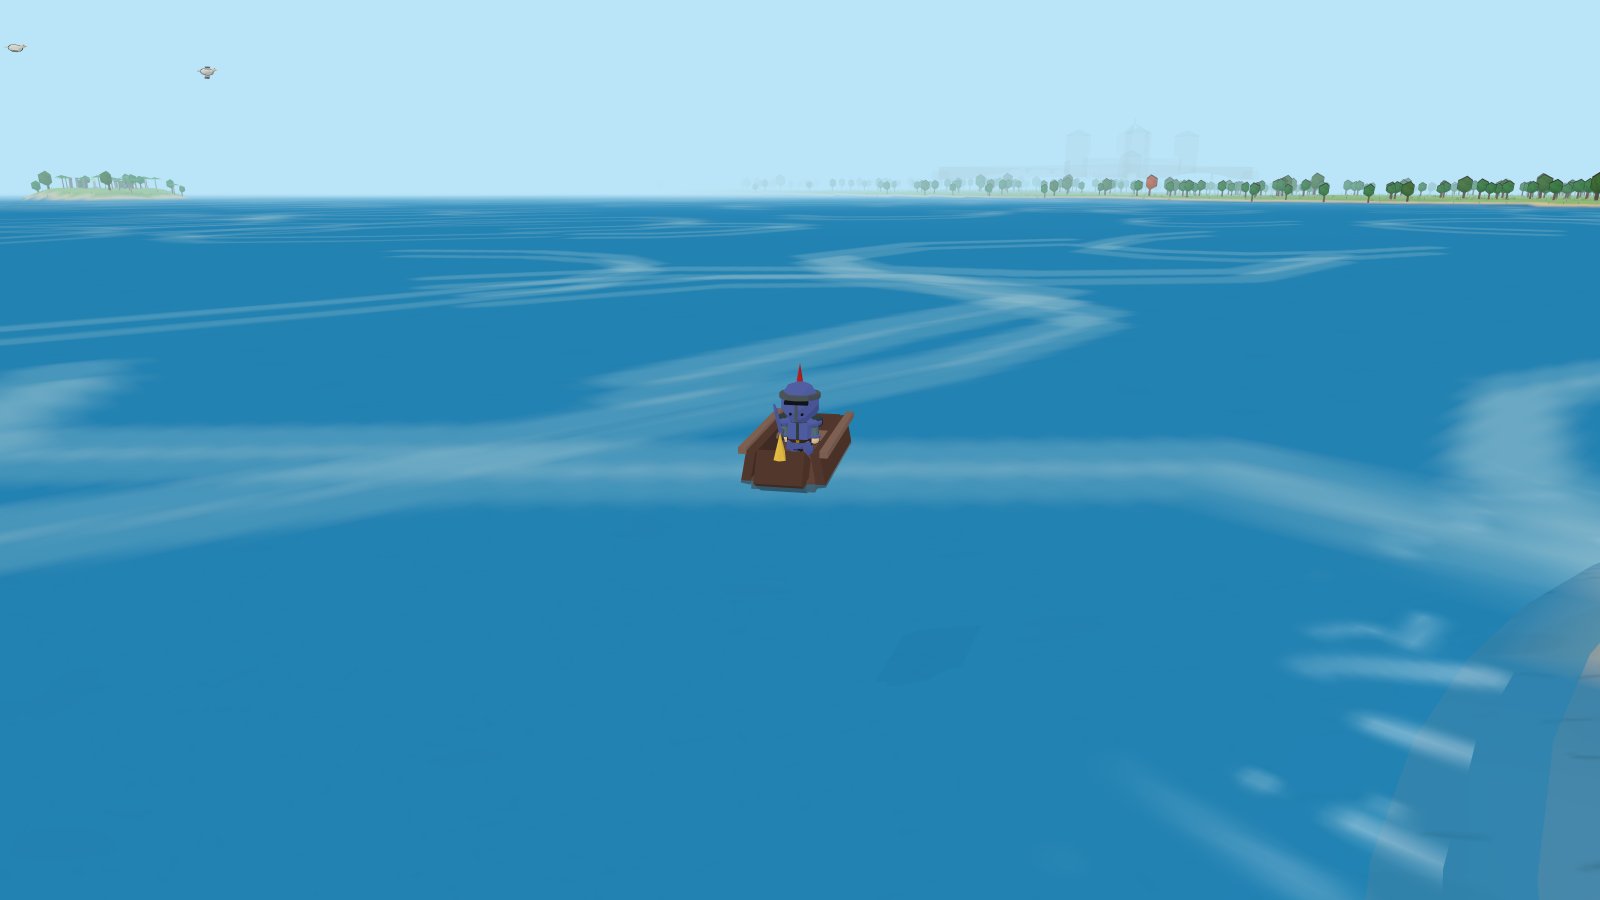
If you can see an island on the horizon, you can sail to it and walk around on it. There are no painted backdrops in this game.
Earn your skiff
You are given your own folding coastal skiff as part of the main story, when you take passage east from the docks at Solmara. There is nothing to buy.
Click open water
Once the skiff is folded on your back, clicking any open water launches it and sails you there. Click land to beach it and step off again.
Stay on the bright water
The dark deeps at the edge of the world sink skiffs. If the water looks black, do not go there.
Sailing opens up the coasts, plus Gullwing Isle, Corsair's Hold, Mirrormere and the Wreck of the Gulls' Wager, the whole southern tropical sea, and the crossings to two other continents. High level mages can skip the voyages entirely with city teleports.
Your own home and farm
Once you have found your feet you can build a house of your own. It is a private space that belongs to you alone.
Go to the ElderHeart
Find Bodkin the builder standing by the bank chest.
Open his catalogue
Talk to him and the build catalogue opens. It lists every room, every piece of furniture and every portal, with what each one costs and what it needs.
Pay from the bank
Raise your first room by paying its coins and materials straight out of your bank. Bodkin stands at the chest for exactly that reason, so you do not have to carry a hundred logs in your bag.
Step through the door
You are in your own home. Use the Build button that appears at the bottom of the screen to add and arrange rooms and furniture.
Farming
Your home comes with plots out in the sun. Till a plot, sow a seed you won from skilling, and the crop grows in real time, ripening even while you are logged out. It is all worked out the moment you next visit, so nothing is wasted while you are away.
Harvesting gives you power food: a solid heal plus a short boost to your stats. It is good, but deliberately not the best food in the game. Now and then you get a seed back, so a farmer can keep the loop going.
Getting home, and getting out again
- The Hearth Teleport spell (Magic 30) takes you back to your own hearth from anywhere. It stays locked until you actually own a home.
- Inside, you can place city portals, each one a teleport to that city straight from your own hall. They are not cheap: a home portal costs 200 times the sigils the matching teleport spell would normally burn.
Visitors
Friends who are in your session can visit while you are there, but only you can build or farm. Guests just look around, and you can send a guest back to the ElderHeart whenever you like.
The wiki has every room, crop, portal cost and grow time if you want the numbers.
Games, arenas and treasure
The games of Castle Greyhold
Castle Greyhold, in the east, is a walled castle given over entirely to games. You win Greyhold tickets and trade them for prizes.
The archery contest
Talk to Range Master Ivet to start. You have 60 seconds to hit the glowing target as many times as you can. Hitting the lit one builds a streak worth more points each time. You need a bow in hand and arrows loaded, and each shot spends an arrow. Score 30 or more to win tickets, and you get Range experience either way.
The Pit
Step through the door into the arena and start it. Three waves of monsters come at you. Beat all three and you walk away with 6 tickets, 750 coins and a pile of health experience.
Lady Fortuna's dice
A simple game of chance, run through conversation. Exactly as fair and as unfair as dice have always been.
The Eventide Colosseum
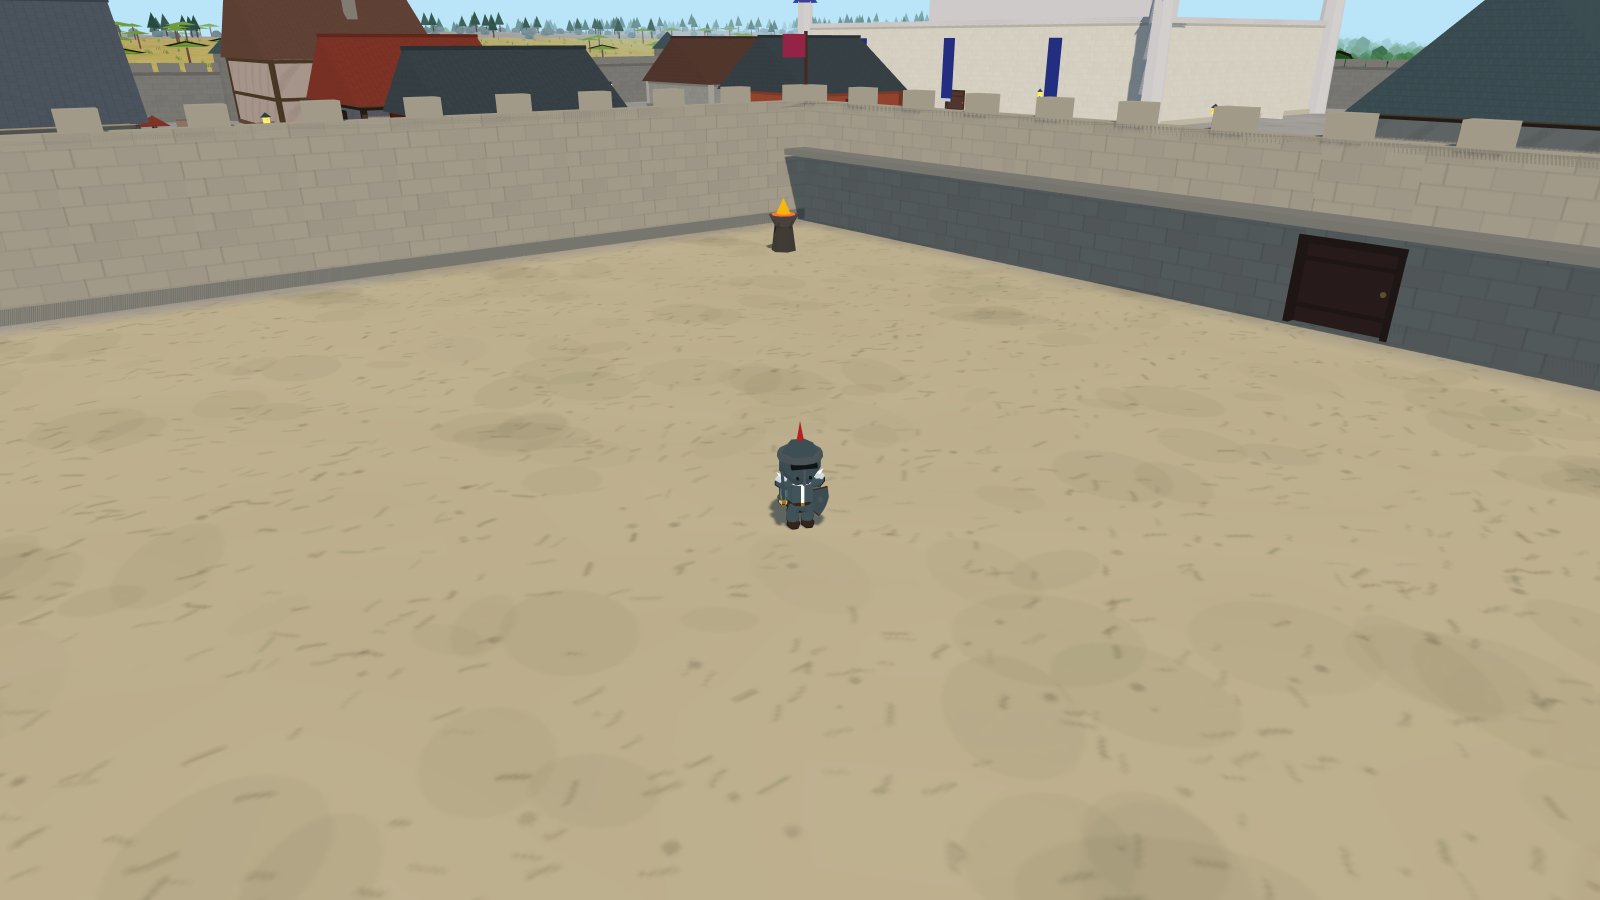
The safest dangerous place in the realm. The Pit Behemoth (level 138), the Storm Revenant (124) and the Iron Colossus (146) wait on the sand.
Arena fights give no experience and no loot. They are pure sport. If you fall, the stewards prop you up outside the door with everything still on you, ready to go again. It is the perfect place to test endgame gear against monsters far above anything else in the game before you risk it for real.
Treasure chests
Every proper cave hides a treasure chest in its deepest room, and the Coronmar sewers keep one per level. Chests refill after a few minutes, and the deeper you go, the better the haul.
The two sealed lairs are the exception. No chest there, just one monster far above anything else in the game and the single weapon it carries.
Hidden collectibles
Scattered around the world are small floating glints. They are easy to miss and easy to grab: just click one. They are a quiet reward for actually looking at the scenery instead of running past it.
And three of the ten cave systems never announce themselves. Rumour says certain lonely ruins hide a stair down to mines the maps never marked. Finding them is the reward.
Friends and playing together
Adding a friend
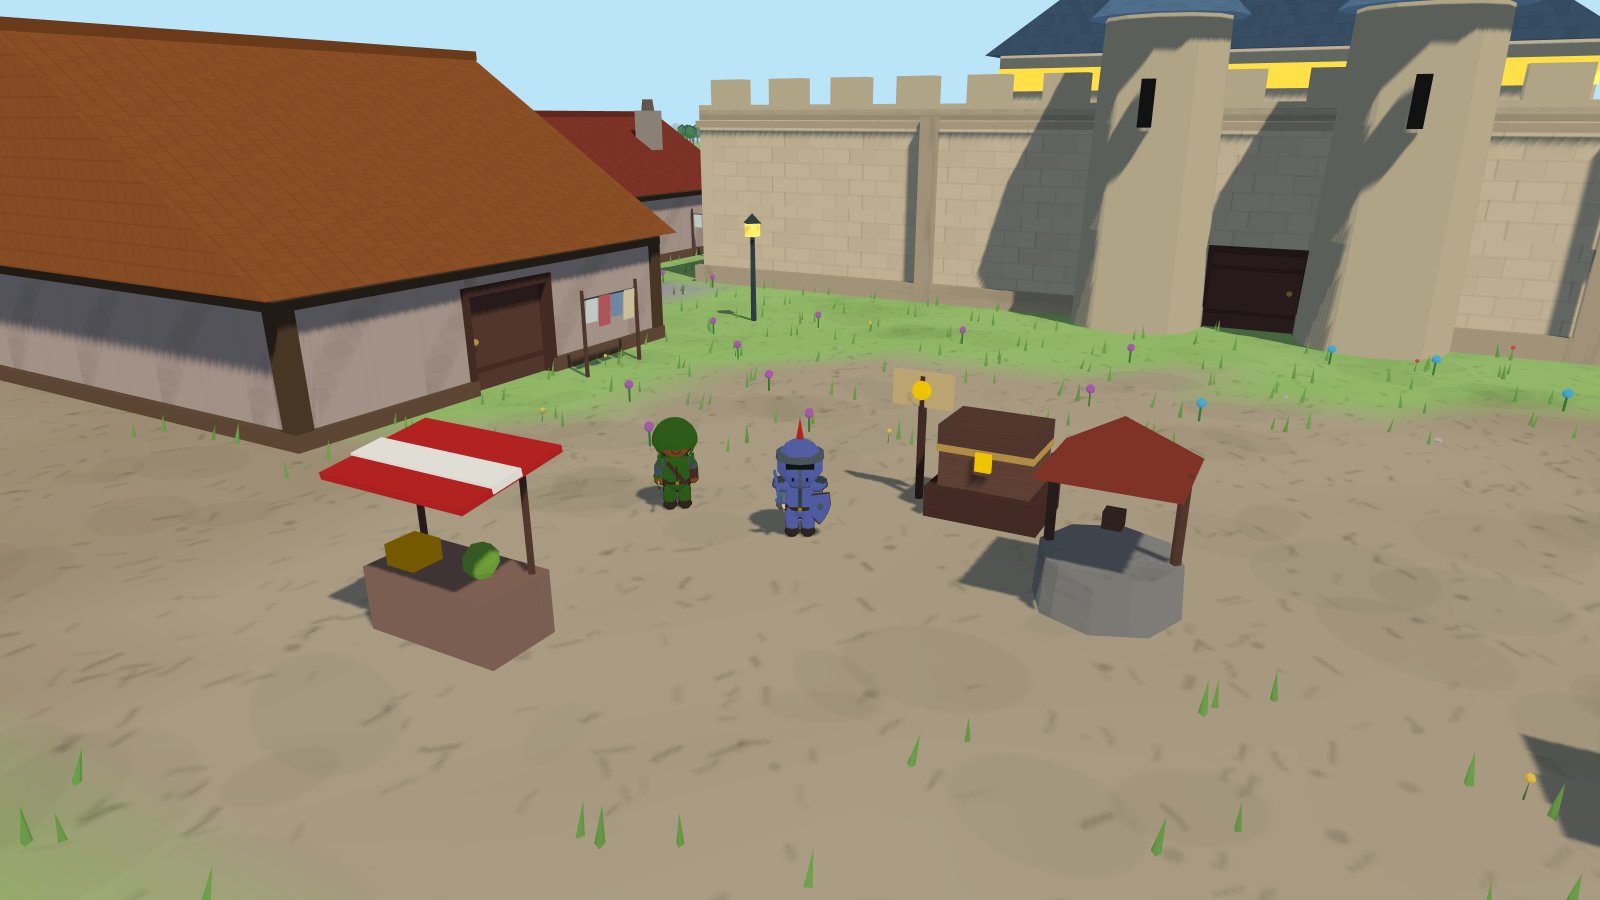
Open the Friends tab, type their username in the box at the bottom and send the request. They accept it from their own Friends tab. After that you can see when each other is online.
The Friends tab
Green dot means online right now. Grey dot means offline.
Invite asks them to come into your game.
Ask to join asks to be let into theirs. They have to say yes.
Requests and invites both show up as rows at the top of this tab, so if you miss the pop up you can still act on it later.
Getting into the same world
One of you opens a world
Whoever presses play first is the host of that world.
Send the invite
Press Invite beside their name, or type /invite theirname in chat.
They accept
A prompt appears on their screen. They confirm, and they arrive in your world.
Play
A small roster appears on screen showing who is in. Up to four people can share a world, and the host can change that limit.
Chat
Press Enter to type, Enter again to send. On a phone, tap the chat bubble in the corner. You can collapse chat down to that bubble at any time, and the game remembers your preference.
There are a few typed commands, mostly for whoever is hosting:
| Command | What it does | Who can use it |
|---|---|---|
| /invite name | Invites a friend into your world | Anyone |
| /kick name | Removes someone from the world | Host |
| /pvp on or off | Lets players attack each other | Host |
| /worldchat on or off | Turns chat on or off for the world | Host |
| /cap 1 to /cap 4 | Sets how many people can be in the world | Host |
Typing an unknown command lists all of them for you.
Trading with another player
Trading swaps items directly between two players. It is built to make scamming very hard, which is why it has a couple of extra steps.
Offer the trade
Press Trade beside their name in the party roster on screen. They get a small prompt and can accept or decline.
Put items in
Click items in your inventory to add them to your side. For a stack, you are asked how many. Click anything on your own side again to take it back out.
Lock your offer
Press Lock offer when you are happy. Both of you have to lock before anything moves on.
Wait out the countdown
A ring counts down five seconds. This is a deliberate pause so you get a proper last look at what is actually on the table.
Confirm
The Confirm button only becomes usable when the countdown finishes. Both of you confirm, and the items swap.
Quest items and a few special items cannot be traded at all. If an item refuses to go in, that is why. Either side can press Cancel at any point and nothing happens.
Worlds and realms
Your character is yours and travels with you. What changes is where you take it.
Your own world
A private copy of the realm, just for you and anybody you invite. Up to four people. It exists while you are playing and packs itself away when you leave. This is the default and it is what most people play in.
A realm
An always-on world that keeps running whether or not you are in it. Official realms are run by us. Player owned realms are rented and run by their owners, each with its own rules and its own community.
Browse what is currently open on the realms page. Each card shows whether the realm is running right now, how full it is, and what it takes to get in.
World settings
If you are the host of your own world, Settings has a World settings button. Guests can open it too, but only the host can change anything.
PvP lets everyone in the world attack each other. Off by default. Turning it on asks you to confirm first, and everyone in the world sees a red warning badge on their screen the whole time it is on.
Chat turns typed chat on or off for the world.
Player limit is 1 to 4. Lowering it does not throw anyone out, it just stops new arrivals.
The Players tab lists who is in and lets the host remove someone.
If the host logs out, the world settings freeze exactly where they were.
Crowns beside names
Some names have a small crown next to them. It tells you what authority that person has, and nothing else:
| Crown | Means | Where you see it |
|---|---|---|
| Gold | Game administrator | Everywhere. It travels with the account. |
| Silver | Game moderator | Everywhere. |
| Purple | Owner of that realm | Only inside their own realm. |
| Teal | Moderator of that realm | Only inside that realm. |
Everyone shows at most one crown, the highest that applies to them. A realm crown never follows someone out of the realm that granted it, because a role in one realm says nothing about who they are anywhere else.
The Settings tab
The gear icon at the end of the tab bar. Everything you can change about how the game looks, sounds and behaves is in here.
Every setting here saves to your device by itself. There is nothing to apply and nothing to confirm.
| Setting | What it does |
|---|---|
| Graphics quality | The one big dial: Ultra, High, Medium or Low. See Graphics settings. |
| Advanced graphics | Opens a panel where you can adjust each effect on its own. Also explained below. |
| Camera zoom | Plus and minus buttons, the same as scrolling or pinching. |
| Fullscreen | Fills the whole screen. On an iPhone this shows how to add the game to your home screen instead, because Safari there has no fullscreen at all. |
| Sound & volume | Mute everything, or set music and effects separately. See Sound. |
| World settings | PvP, chat and the player limit for your world. See Worlds and realms. |
| Stuck? Return to Brightmeadow | A free teleport back to the starting town. Use it if you have somehow got yourself somewhere you cannot leave. |
| Help & Support | Replay the walkthrough, report a player, report a bug, contact support, or open this guide. |
| Controls & keys | A small folded up reminder of the controls, tucked at the bottom of the tab. |
| Log out | Saves and signs you out. Your progress is already saved anyway. |
You may also see a Warden's Menu button. That is a set of tools for testing the game. Using them permanently marks your character, and marked characters can only ever play with other marked characters, so it warns you clearly before anything happens. If you want your progress to count, leave it alone.
Graphics settings explained
This is the section people ask about most, so here is what every single option actually does, in plain words.
The short version: the game picks a sensible setting for your device on its own, and it quietly adjusts if it sees you struggling. You only need to touch any of this if you want it prettier, or if it is not running as smoothly as you would like.
The four quality presets
One dropdown, four choices. Each one sets every other option to a matching bundle, so picking a preset is a clean slate.
| Preset | Best for | What you get |
|---|---|---|
| Ultra | A gaming computer | Full shadows that move with everything including characters, the thickest grass and flowers, outlines on everything, and it never quietly lowers the resolution to keep up. This is the "I have the hardware, give me everything" setting. |
| High | Most desktops and decent laptops | Real shadows for the world (buildings, trees, rocks), simple round shadows under characters, thick ground cover, outlines everywhere. Will gently reduce sharpness if it starts to struggle. |
| Medium | Phones and tablets | No shadow map at all, just a soft round shadow under each character so nobody looks like they are floating. Medium ground cover, outlines only on nearby things. |
| Low | Older or slower devices | The same simple character shadows, the thinnest ground cover, no foam on the shoreline. Everything still there, just cheaper to draw. |
If you change anything in the Advanced panel, the dropdown changes to say Custom, because the preset name no longer describes what you are actually seeing. Picking a preset again wipes all your custom changes back to that preset's clean slate.
Advanced graphics, option by option
Press Advanced graphics in Settings. Every change here applies instantly and saves to this device.
The word reload beside an option means that change only takes effect the next time you load the page, because your browser decides those two things when it first starts drawing.
Shadows
How shadows are drawn. This is usually the biggest single thing you can change.
| Setting | What you see | Cost |
|---|---|---|
| Off | No shadows at all. Characters can look a bit like they are hovering. | Cheapest |
| Simple | A soft round shadow under each character and monster. No real shadows from buildings or trees. Looks surprisingly good and costs almost nothing. | Very cheap |
| Low and Medium | Real shadows cast by the world: buildings, trees, rocks. They are worked out once and reused, so they do not follow moving things. Characters keep their round shadow. | Moderate |
| High | Full shadows that follow everything as it moves, characters and monsters included. | Most expensive |
Ground cover
How much grass, flowers and scatter is sprinkled across the ground. Low, Medium, High or Ultra. It changes how lush the world looks and how many little things have to be drawn. Turning it down is an easy win on a phone.
Outlines
The dark edge drawn around things, which gives the game its storybook look.
- Off is the cheapest and flattest.
- Nearby outlines only things close to you.
- Everywhere outlines everything you can see.
Render scale
How many pixels the game actually draws, from 40% up to 100%. At 100% it draws at your screen's full sharpness. At 60% it draws a smaller picture and stretches it up to fit, which is softer but a lot faster.
This is the strongest performance lever you have. If the game is smooth but you want it smoother, come here. Dropping to 80% often costs very little in looks and gives a lot back.
Auto-adjust under load
When this is on, the game watches how it is running and quietly softens the picture a little when frames start to drag, then sharpens it back up when there is room again. It is doing the render scale change for you, moment to moment.
It is on by default on High, Medium and Low, and off on Ultra, because Ultra is the setting that promises to never quietly reduce anything. Turn it off if you would rather keep a constant sharpness and accept a slower frame rate.
Auto-reduce quality
The bigger sibling of the option above. If your device is still struggling even after the picture has been softened as far as it goes, this drops the whole quality preset down one step to rescue you.
It happens at most twice in a session, and the moment you pick a quality preset by hand it stops doing it, because you have clearly taken charge. Turn it off if you want your chosen preset to stay put no matter what.
FPS cap
A limit on how many times per second the game redraws.
- Uncapped draws as fast as your screen allows. This is the default on computers.
- 60 is the default on phones and tablets. Many modern phones run at 120 times a second, which for a point and click game is a lot of extra work, heat and battery for no real benefit.
- 30 halves the work again. Useful for stretching battery life, or on a device that cannot hold 60 anyway. A steady 30 feels much better than a jumpy 45.
Shore foam
The white foam where water meets the shore. Pretty, and cheap to turn off. It is off by default on the Low preset.
Antialiasing
Smooths jagged, stair stepped edges on things like roof lines and fence posts. On by default on High and Ultra, and also on phones and tablets, where the pixels are small enough that unsmoothed edges shimmer badly as you move.
This one needs a page reload to take effect, because your browser decides it once, when the game first starts drawing.
High-performance GPU
This one matters a lot on laptops, so it has its own section: see Making the game run faster just below. In short, many laptops have two graphics chips, a slow efficient one and a fast hungry one. This asks your browser for the fast one. It only appears on computers, because phones only have the one chip.
It also needs a page reload to take effect.
View distance
How far away you can see before the world fades out. Short, Normal, Far or Very far.
Further means more of the world has to be drawn at once. Short is a solid gain on a weak device, and honestly you rarely miss it in a town. Very far is glorious on a mountain top if your machine can take it.
Recommended starting points
| Your device | Try this |
|---|---|
| Gaming desktop or laptop | Ultra, view distance Far or Very far. Turn on High-performance GPU and reload. |
| Normal laptop or office computer | High, view distance Normal. If it stutters, shadows to Simple. |
| Older laptop | Medium, view distance Short, render scale 80%. |
| Recent phone or tablet | Medium, which is the default. Leave the 60 cap on for battery and heat. |
| Older phone | Low, view distance Short, render scale 60% to 70%, FPS cap 30. |
Settings save per device, so your phone can be on Low while your computer is on Ultra, and neither one interferes with the other.
Making the game run faster
If the game feels choppy, work down this list. The early items cost you the least and usually fix it.
Quick wins, in order
Close other tabs
Every open tab is using memory, and some of them are quietly playing video. This is the single most common cause of a slow browser game, and it takes five seconds to rule out.
Plug the laptop in
On battery, laptops deliberately hold back to save power. Plugging in often doubles what the machine will give you. Keep reading, there is more on this below.
Drop shadows to Simple
Settings, Advanced graphics, Shadows. The biggest single saving for the smallest visual change.
Set view distance to Short
Less world to draw at once. You barely notice it in towns and caves.
Lower the render scale
Try 80%, then 70%. The picture gets a little softer and the game gets a lot smoother.
Step the whole preset down
Ultra to High, or High to Medium. Presets are tuned bundles, so this is a bigger, cleaner jump than fiddling with one option at a time.
Restart your browser
Browsers can lose access to your graphics chip after a long session, or after your computer wakes from sleep, and fall back to drawing everything the slow way. A restart puts it right.
Laptops: making sure the game gets full power
This is the big one, and it catches nearly everybody with a gaming laptop.
Most laptops have two graphics chips. One is small, slow and sips battery, built into the main processor. The other is a proper graphics card, much faster and much hungrier. Your laptop tries to guess which one each program needs, and it very often guesses wrong for a browser, because most browsing does not need any power at all. So the game ends up running on the slow chip while the fast one sits there doing nothing.
Fix it in three places, in this order.
1. In the game
Open Settings, then Advanced graphics, and turn on High-performance GPU. Then reload the page, because that setting is only read when the game first starts drawing. This asks your browser politely to use the fast chip. It usually works on its own, but on some machines the two steps below are what actually make it stick.
2. In Windows
- Open Settings, then System, then Display, then Graphics. On some versions this is under Display, Graphics settings.
- Find your browser in the list. If it is not there, use Browse and pick the browser program yourself.
- Set it to High performance.
- Close the browser completely and open it again.
While you are in Windows settings, also check System, then Power & battery, and set the power mode to Best performance. Battery saver caps how hard the machine will work, which shows up as an oddly capped frame rate that no graphics setting will fix.
If you have an NVIDIA card you can also do this in the NVIDIA Control Panel, under Manage 3D settings, Program Settings: add your browser and set the preferred processor to the high performance NVIDIA processor. AMD's software has the same idea under its graphics or gaming section.
3. In the browser
Make sure the browser is allowed to use your graphics chip at all. In Chrome or Edge, open Settings, then System, and turn on Use graphics acceleration when available. In Firefox it is Settings, General, Performance, where you untick "Use recommended performance settings" and then tick "Use hardware acceleration when available". Restart the browser afterwards.
If that option is off, the game is being drawn entirely by your main processor, which is dramatically slower and will feel bad no matter what else you change.
| Symptom | Most likely cause |
|---|---|
| Fine when plugged in, choppy on battery | Battery saver or a power mode limit. Set the power mode to best performance. |
| Slow even though it is a good machine | The browser is on the slow graphics chip. Do the three steps above. |
| Very slow everywhere, even the menus | Graphics acceleration is turned off in the browser. |
| Was fine, got slow after hours or after sleep | The browser lost its graphics connection. Restart the browser. |
| Fine outdoors, choppy in big towns | Normal. Towns are the heaviest scenes. Lower ground cover and view distance. |
| Smooth then a sudden stutter | Usually something loading in. It settles after a few seconds. |
Macs
macOS handles the two chip switch itself and generally gets it right. If you are on an older Mac with a discrete card, turn off Automatic graphics switching in System Settings, under Battery or Energy Saver, and keep the Mac plugged in. Also check that Low Power Mode is off.
Phones and tablets
- Take it out of low power mode. Battery saver on a phone caps the processor hard, and no graphics setting can work around that.
- Let it cool down. A phone that has got hot will deliberately slow itself down until it cools. If the game was fine for twenty minutes and then got worse, this is almost always why. It is not damage, and it recovers.
- Close background apps, especially anything playing video or navigating.
- Keep the FPS cap at 60, or drop it to 30. On a 120 times a second screen, uncapping doubles the work and the heat for something you will not see in a point and click game.
- Install the game to your home screen. No browser bars means more of the screen is world, and a slightly lighter page.
Sound and music
Open Settings and press Open beside Sound & volume.
Mute everything silences the lot in one tick.
Overall volume is the master control.
Music and Sound effects are separate, so you can keep the chop of an axe and the clang of a sword while turning the music down.
Browsers refuse to play any sound until you interact with the page, which is a rule they all follow and not something we can change. So if the game is silent when it first loads, click anywhere and it will start.
Your account, saving and safety
Saving
There is no save button and you do not need one. The game saves your character roughly every 45 seconds while you play, and again when you log out. Your progress lives on our servers, not on your device, so it follows you between your phone, your tablet and your computer.
Account or guest
| Free account | Guest | |
|---|---|---|
| Progress saved online | Yes | Yes |
| Play on your other devices | Yes | No, only this browser |
| Survives clearing browser data | Yes | No, characters are lost for good |
| Friends and invites | Yes | No |
| Hiscores and a public profile | Yes | No |
| Can be recovered if you forget the password | Yes | Nothing to recover |
A guest character is a fine way to try the game. Just do not build a hundred hours on one. You can make an account at any point from the account page.
Getting help and reporting problems
All of it lives in one place: Settings, then Help & Support.
Restart the tutorial replays the walkthrough from step one. Use it as often as you like.
Report a player for anyone behaving badly. Tell us who and what happened.
Report a bug if something in the game is broken. Say what you were doing when it happened, it helps enormously.
Support opens the support page for account problems and anything else.
Staying safe
- Nobody from the team will ever ask for your password. Not in chat, not by email, not ever. Anyone who does is not us.
- Check the trade window, not the promise. The five second countdown exists so you get a proper look at what is actually being offered. Use it.
- Only official staff have gold or silver crowns. A purple or teal crown is a realm role, which means authority inside that one realm and nothing more.
- Report rather than argue. Use Report a player and move on with your evening.
Our privacy policy and terms of service spell out what we collect and what the rules are.
Where to go
Roughly in the order a new adventurer meets them.
The old lands
- Brightmeadow (centre): your home base. Shops, quests, the smithy, the chapel that heals you for free, and the Gilded Tankard for hot food.
- The farmlands (south east): cows, sheep and chickens for easy first fights, plus a starter mine with copper, tin and iron.
- Saltmere (south west): fishing central. Sea water off the docks, so net, pot and harpoon, from shrimp all the way to shark.
- Eastwood and Oakhurst (east): goblins raiding the farms, then wolves, boars and bears as you toughen up. Oakhurst sells the best axes and bows.
- Duskmoor (west): the wizard's tower and sigil shop. Skeletons and dark wizards roam the moor, and worse things further west.
- Mirefen (south west, in the swamp): monkfish waters and swamp horrors. Bring a net and a weapon.
- Frosthollow (north): the mining town. Iron and coal nearby, cobalt and verdite up the slopes, ice wolves in between.
- Zahara (north east): desert town with gold rocks, forbidden sigils, and the King Golem in the ruins next door.
- Frostpeak (far north): the dragon's mountain. Ice warriors and frost giants guard the way up.
- The Old Keep (far north west): shadow knights, ancient guardians, elder trees, arcanite rocks and the Old Keep Revenant. Do not go early.
The great cities
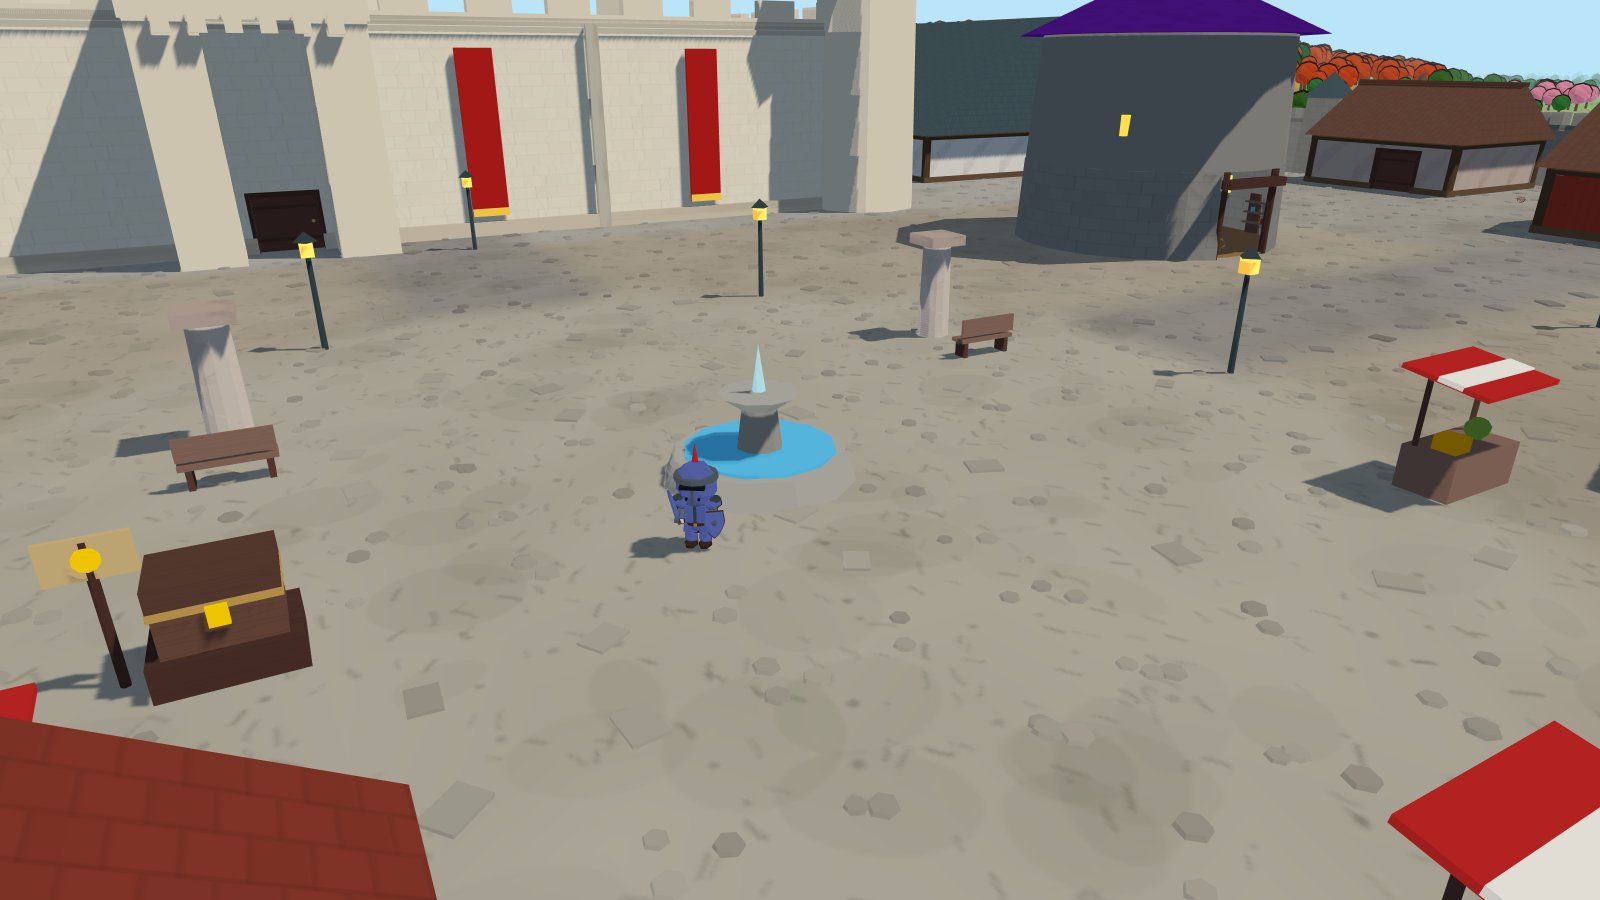
- Coronmar (south west): the walled Crown City. Three gates, a castle with several floors, the finest shops in the realm, and the Sewers beneath that Steward Anselm would dearly love someone to clear.
- Aurelia (deep south): the Golden City. Grand markets, golden roofs, and Chancellor Elara, who pays a fortune to anyone who can kill a drake.
- Valeport and Solmara (south east coast): harbour cities of trade and deep water fishing. Smugglers up the coast hold a shipment that is not theirs.
- Highspire (east highlands): a city of mages whose great beacon is guttering out.
- Castle Greyhold (east): a walled castle of games. The archery range, the Pit, and Lady Fortuna's dice. See Games and arenas.
- Thornwall (far east): a grim fortress city, the last safe wall before the ash.
- The Stormcrown and the Vale Heights: two great massifs, snow capped peaks ringed in autumn forest. The heights themselves are too steep to climb. The maple country on their skirts is the reward.
- The Scorchlands (far north east): the endgame. A burning waste of ash and lava where ash stalkers, cinder wraiths, magma golems and the Ember Drake guard the greatest treasure in the realm.
Across the seas
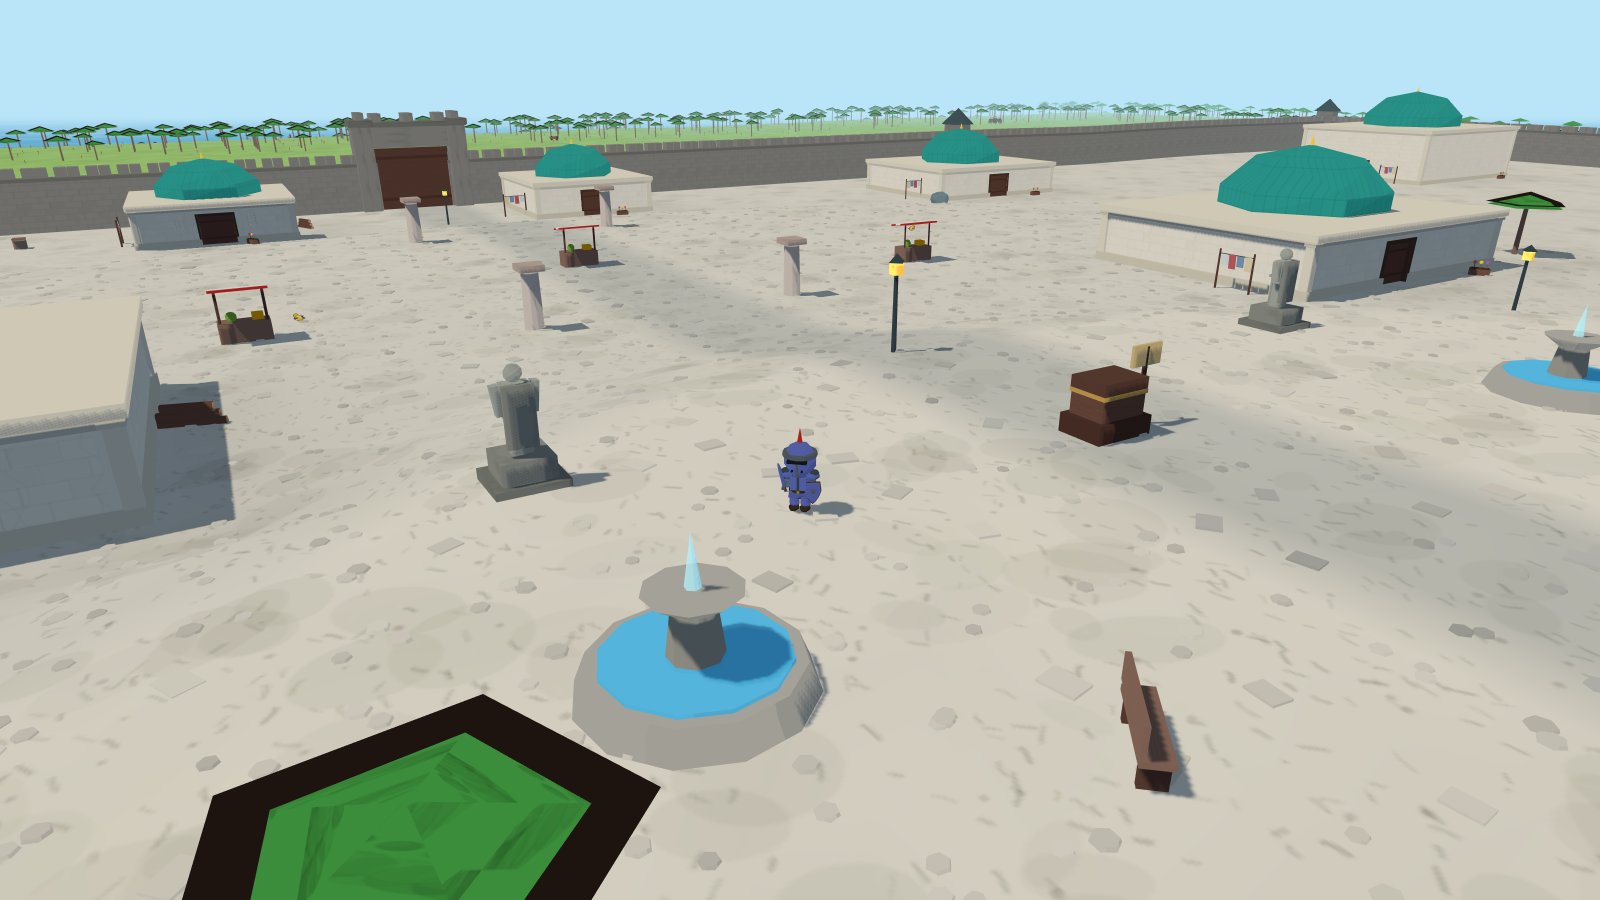
- The Gilded Coast, east across the Sunfall Sea: the richest land in the game. The gilded capital Auremont, the mining town Vessa with gold and runite in its hills, terraced gold country, and the Hollowvale, a grey dead crater every local will tell you to stay out of.
- Sunhaven Isle, south: the realm's holiday spot. A waterfall pouring into a turquoise lagoon, a beach village with the Tipsy Tiki bar, easy fishing, and sand crabs that make gentle training for new fighters. The reef past the lagoon is another story.
- Velmora, further south west: a marble metropolis in three shining tiers, crowned by the domed Pearl Palace. Everything a city should have, plus cutpurses in the arcades and marble sentinels guarding the palace tier.
- Vespera, west across the Dusk Sea: the biggest landmass in the game. A frozen north, prairie heartlands, a desert basin and a warm southern taper. Your port of entry is Westhaven.
- Vesperion, inland on Vespera: the greatest city in the world. Its one gate opens only for the Warden's seal, which comes late in the main story. Inside are the best stocked shops in the game, the Silver Vault bank, and the Eventide Colosseum.
Everything above, and every monster, spell, item and secret in the realm, is catalogued in the wiki. There is also a full world map.
Tips for new players
- Do The Road from Brightmeadow first. It walks you through fishing, cooking and woodcutting and pays for your first upgrades.
- Buy an axe and a tinderbox before you leave town. Cooked food from your own fire is free healing forever.
- Match your gear to your level. A new sword every 10 levels makes a bigger difference than you think.
- Check a monster's colour before you swing. Red names hit back harder than you expect.
- Wolves stop chasing you once you outgrow them. If somewhere feels too dangerous, come back 20 levels later and stroll through.
- Keep sigils for one teleport spell on you at all times. Walking home is scenic exactly once.
- Sell your spare pelts, logs and fish. Coins buy arrows, sigils and better tools.
- Train Fishing and Cooking together. Catch a load, cook the lot, eat the evidence.
- Before a boss, fill your whole bag with the best food you can cook. Every hero who died skipped this step.
- Sleeping in a bed heals you completely, for free. Every inn has beds upstairs.
- Right click everything. It is the fastest way to learn what a thing can do.
- Talk to everyone. The people of this realm point the way to every secret in it.
Problems and answers
The screen is black, or the game will not load
- Reload the page properly: Ctrl Shift R on Windows, Cmd Shift R on a Mac.
- Update your browser. The game needs a reasonably recent one.
- Turn on graphics acceleration in your browser settings, then restart the browser.
- Try it in Chrome to rule out a browser specific problem.
- Check the status page in case it is us and not you.
It says my game is running an old version
Your browser served you a cached copy of the game. Do a hard reload with Ctrl Shift R, or clear this site's cache. If that does not do it, an update is rolling out right now. Wait a minute and try again.
The game is choppy or slow
Go to Making the game run faster. If you are on a laptop, the section about the two graphics chips is almost certainly your answer.
I clicked something and nothing happened
- You may not have the level for it. A level 60 tree will not budge for a level 59 woodcutter.
- You may not have the tool. Chopping needs an axe in your bag, mining needs a pickaxe, fishing needs the right gear for that catch.
- Your bag may be full. 28 items is the limit.
- Check the message log in the bottom left. The game almost always says why.
I cannot buy something
Not enough coins, a full bag, or the shop is out of stock. The message in the bottom left tells you which. Shops restock over time.
I am stuck somewhere and cannot get out
Open Settings and use Stuck? Return to Brightmeadow. It is free and always works.
I lost my items when I died
You did not. Dying puts you back at the Brightmeadow chapel with everything you were carrying. Check your inventory and equipment tabs. If something really is missing, use Report a bug and tell us what happened.
There is no sound
Click anywhere on the page first. Browsers block audio until you interact with the page. After that, check Settings, Sound & volume, and your device volume.
My friend cannot join me
- You both need real accounts. Guests cannot use friends or invites.
- You both need to be friends already, with the request accepted on both sides.
- Your world may be full. The limit is four, and the host can change it in World settings.
- Marked and unmarked characters always play separately. If one of you has used the Warden's Menu, that is why.
Can I play on my phone and my computer with the same character?
Yes, as long as you have an account rather than a guest character. Your progress is saved online, so log in anywhere and carry on. One character at a time, though.
Can I play offline?
No. The world runs on our servers, so you need a connection. Installing the game as an app makes it open faster and shows a friendly page instead of a browser error when you lose signal, but it does not make the game playable offline.
Is it really free? Is there anything to buy?
It is free. No download, no battle pass, no energy timers, no premium currency. Everything you get, you earn in the game.
I forgot my password
Use the password reset page. If you cannot get in at all, the support page is the place to go.
What is the Warden's Menu, and should I use it?
It is a set of testing tools. Using them permanently marks your character with the Warden's Mark, and marked characters can only ever play with other marked characters. It warns you clearly before anything happens. If you want your progress to count for anything, leave it alone.